Introduction:
if this iterm can not meet your needs
our products have 1 Year Warranty to ensure the quality
Before you place the order
make sure it fits your vehicle
we hope you enjoy your shopping
Note:
Some of the parts we have grease fittings and other parts come factory sealed
you may receive 1 of the parts.but don\'t worry
this does not affect the performance or quality of the parts
Fit for
2007 DODGE CALIBER Excluding 1.8L Engines
2008 - 2009 DODGE CALIBER Excluding SRT + R/T
2007 - 2009 JEEP COMPASS MK FWD Models
2007 - 2009 JEEP COMPASS MK 4 Wheel Drive without Off-Road Package
2007 - 2009 JEEP PATRIOT MK FWD Models
2007 - 2009 JEEP PATRIOT MK 4 Wheel Drive without Off-Road Package
Package Includes:
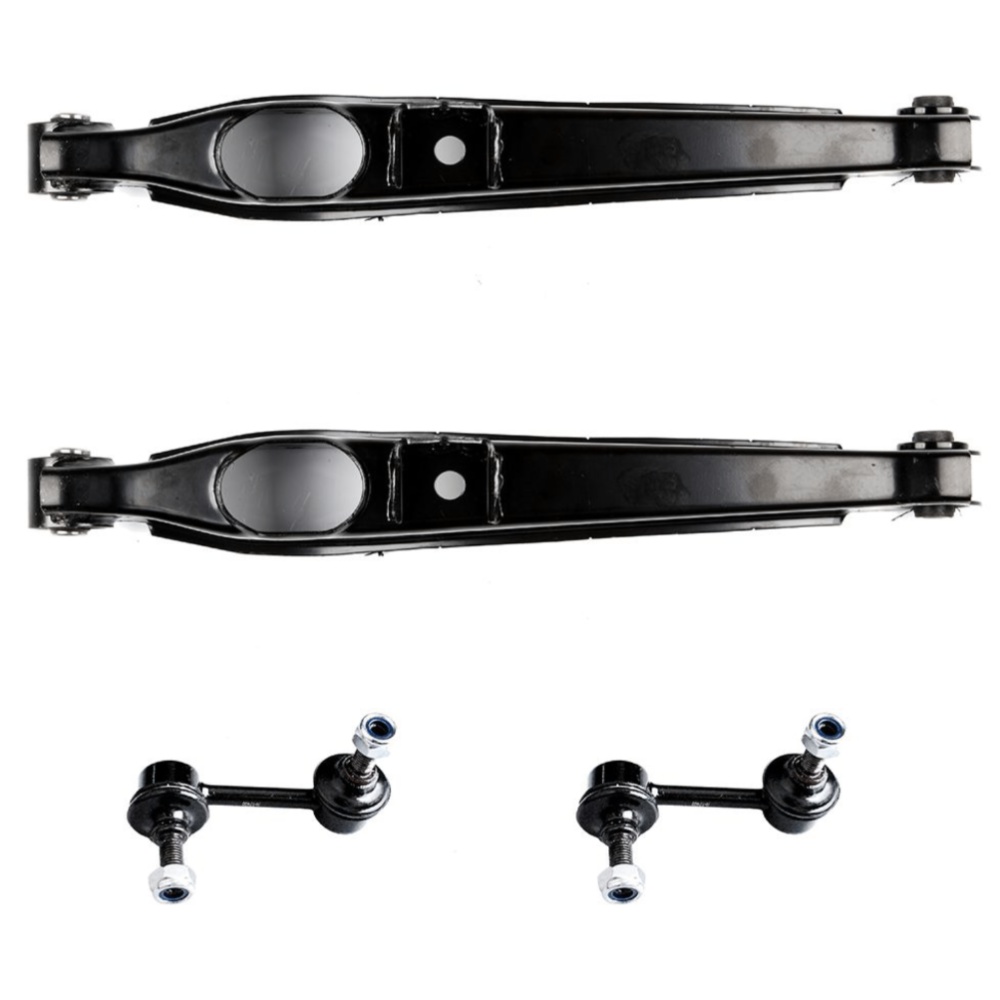
2x Rear Stabilizer Sway Bar End Link - K750058
2x Rear Lower Control Arm Assembly - MS251007
Suspension Control Arm
Control arms are installed in pairs on the front and rear axle and connect the chassis to the wheels as part of the suspension. Therefore, they have a significant influence on the driving characteristics of the vehicle
A dynamic or a comfortable driving style? The control arms are individually adjusted to the vehicle depending on the desired characteristics. They also absorb lateral movements and forces resulting from driving off and braking
Suspension Control Arm Replacement Guideline:
A defective control arm can manifest in the following ways:
(1).Noise (squeaking, creaking, rumbling)
(2).Deteriorating driveability
(3).Increasingly woolly and imprecise steering
(4).Uneven tyre wear
Tip:If the control arm is in working order, it is possible to only replace the defective bearings and joints. However, replacing bearings, control arm bushings and ball joints can be very complex and costly
1.First lift the vehicle using a car lift, ideally a wheel-free four-post car lift. This makes it easier to correctly tighten the control arm fixing screws
WARNING:Depending on the axle design, the control arm may need to be secured against falling with a suitable device, e.g. a transmission lifter
2.Treat the fixing screws and nuts of the control arm with rust solvent and leave it to work for a few minutes so that they are easier to loosen
3.On vehicles with automatic headlight levelling, it may be necessary to detach the leveling sensor from the control arm
4.If the stabilizer is connected to the control arm, the next step is to loosen and remove the corresponding stabiliser fixing screws
5.Loosen and remove the control arm fixing screws
6.Loosen the ball joint at the steering knuckle with a suitable special tool (e.g. a puller)
7.Remove the old control arm
8.Clean the mounting flange of the ball joint pin on the steering knuckle with sandpaper and then with brake cleaner. Otherwise single rust particles can enter the new control arm joint via the ball pin, potentially leading to premature failure of the joint
9.Fit the new control arm with the supplied accessories and attach new fixing screws and nuts
10.Reattach the stabilizer and, if applicable, the leveling sensor for headlight leveling to the control arm
NOTE:Do not tighten the fixing screws and nuts in this step, otherwise the rubber mounts will twist when the suspension compresses. This would lead to undesired preloading onf the mounts
12.Tighten the fixing screws with the torque stipulated by the vehicle manufacturer
13.Lower the vehicle all the way
14.Measure the chassis and adjust if necessary
15.Check and, if necessary, adjust the headlight settings on vehicles with automatic headlight leveling where the leveling sensor is attached to the control arm
16.To conclude, test-drive the vehicle
Sway Bar
Some control arm bushings can be replaced with the arm still on the vehicle; others require removal of the arm. On a few applications, control arm bushings are threaded into the control arm, but most are press fitted
Press fitted bushings can be removed and installed with a bushing driver. Some may be removed with an air chisel, and some may be pressed into the arm with the retaining nut. This method can require periodic vibration of the control arm to coax the bushing into place
Care must be used in bushing replacement to avoid damage to the control arm. To properly position the bushing, the weight of the vehicle must be on the suspension before tightening the nut on most designs. Check the service information for the vehicle for the proper procedure
Replacement of other types of suspension bushings is generally straightforward. Consult the service information
Sway Bar Stabilizer Link Replacement Guideline:
While driving, the following signs may indicate a faulty sway bar stabilizer link:
(1).Rattling and thumping noises on rough roads
(3).Stronger inclination of the vehicle during cornering
If the sway bar stabilizer link is found to be defective, it should be replaced as described below
1.Raise vehicle and remove front wheels
Tip:Always check both stabilizer links and replace them in pairs if necessary
2.Spray fastening nuts of the stabilizer link with rust remover and let act for a few minutes
3.Loosen the lower fastening nut of the stabilizer link at the stabilizer and remove
Tip:If the ball stud also starts to turn, hold it with a suitable tool
4.Press stabilizer link out of torsion bar
5.Loosen the upper fastening nut of the stabilizer link at the suspension strut and remove it
6.Press stabilizer link at suspension strut out of bracket
7.Insert new stabilizer link at suspension strut
8.Tighten stabilizer link at suspension strut to the tightening torque specified by the vehicle manufacturer
Tip:Secure the ball stud against twisting with a suitable tool
9.Insert new stabilizer link at stabilizer
10.Tighten stabilizer link at stabilizer to the tightening torque specified by the vehicle manufacturer
11.Remount the front wheels. Lower the vehicle and tighten the wheel studs to the tightening torque specified by the vehicle manufacturer
Tip:Even if replacing the stabilizer link does not directly affect the chassis setting, we recommend checking the axle setting and adjusting if necessary after working on the suspension
12.Conclude with a test drive
Frequently Asked Questions
(1).What\'s the function of control arm?
The control arm connects the hub and the frame of the car. There are ball joints on the hub side and bushings on the frame side to achieve up and down instead of forward and rearward
(2).What is the significance of the control arm for the car?
(3).How to tell the quality of control arm?
Look at the materials and processing of the control arm: the materials used to control the arm, common are steel and aluminum alloy. In ordinary family cars, steel control arms are very common, and the basic appeal is to meet the strength while controlling costs. In the middle and high-end models, you will see the control arm of the aluminum alloy and the wheel bearing housing. In addition to meeting the strength of the suspension, this material can further reduce the weight and reduce the weight of the suspension spring to improve the suspension response. Improve driving performance.
(4).Do I need to replace the control arm if the bushings are worn? What is the safety risk?
(5).What is the average cost of replacing control arms?
The cost to replace control arms depend on the vehicle. Control arms cost different amounts depending on the vehicle, as well as the labor to install. Some are easy to install and take little time, while others can take several hours
(6).What is sway bar?
(7).What are the symptoms of a bad sway bar?
(8).What happens when a stabilizer bar breaks?
(9).What is the most important tip to offer to help with anti-sway bar installation?
The most important thing is to ensure is that your wheels are not hanging. The suspension should be compressed so the control arms, etc. are at the same position they would be if the vehicle were sitting at ride height. This can be done by using ramps, a drive on lift, or simply loading the wheels if the vehicle is on jack stands or a two point lift. If this is not done the arc that the bar and suspension moves through due to the excessive travel can make things very difficult to line up
(10).How long will it take to replace the front sway bar?