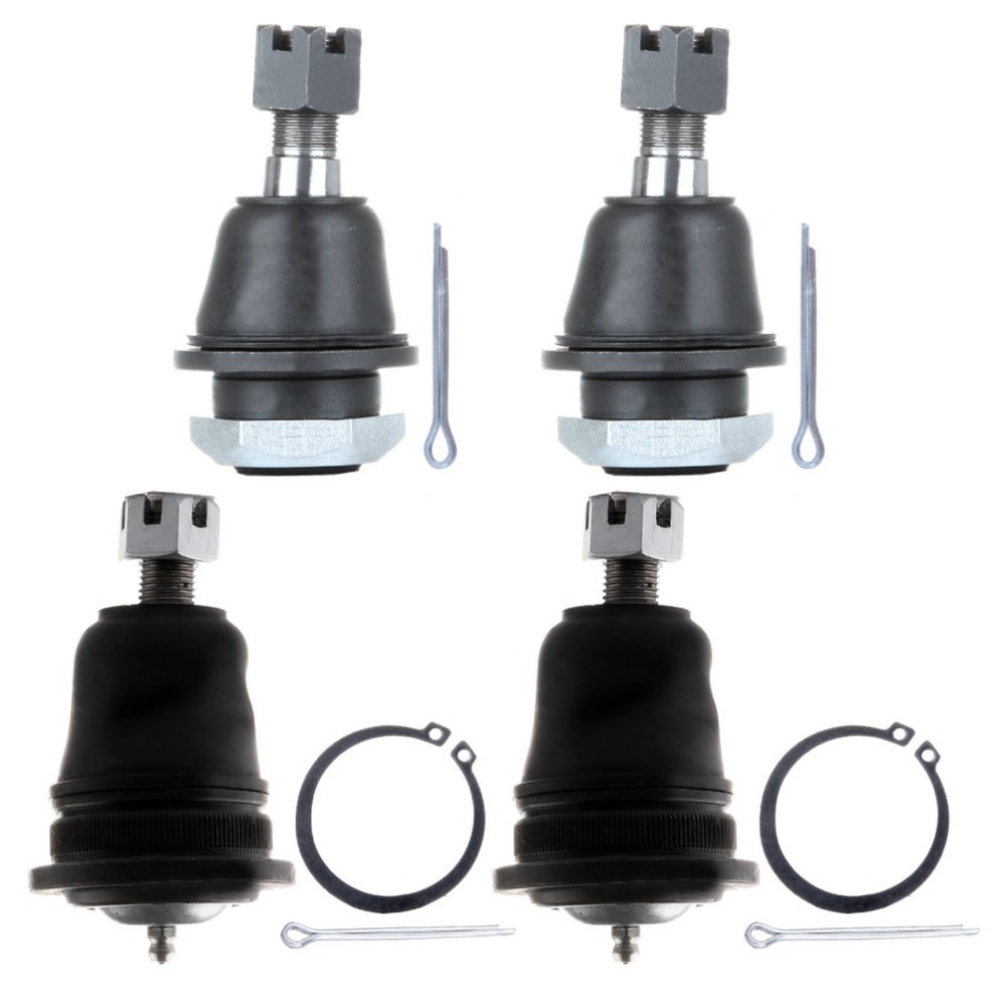

4pcs Front Upper & Lower Ball Joints Kit For 98-04 Frontier 00-04 Xterra 2.4L
US$65.36-4%US$68.12
Key specifications
- Condition
- New
- Country of Origin
- US
- Has OE
- No
- Manufacturer Part Number
- E81302001CP
- Interchange Part Number
- K90663 K80591
Full product details
Specifications
| Product attributes: Condition | New | Product attributes: Country of Origin | US |
|---|---|---|---|
| Product attributes: Has OE | No | Custom attributes: Manufacturer Part Number | E81302001CP |
| Custom attributes: Interchange Part Number | K90663 K80591 | Custom attributes: Placement on Vehicle | Left, Right, Front, Upper, Lower |
| Custom attributes: Country/Region of Manufacture | China | Custom attributes: Type | Ball Joint |
| Custom attributes: Items Included | Mounting Hardware | Custom attributes: Features | Greasable |
| Custom attributes: OE/OEM Part Number | 545008B525, 545008B550, 545008Z400, 545009Z510 | Custom attributes: Material | Alloy Steel |
| Custom attributes: Mounting Style | Bolt-On | Custom attributes: Universal Fitment | No |
| Custom attributes: Surface Finish | Premium Quality | Custom attributes: Kit Parts Included | Ball Joint |
| Custom attributes: Greasable or Sealed | Greasable | Custom attributes: Suspension Grade | Standard |
| Custom attributes: Custom Bundle | Yes | Custom attributes: Cotter Pin Hole | Yes |
| Custom attributes: Kit or Single Part | Kit | Custom attributes: Warranty Period | 1 Year warranty |
| Custom attributes: Adjustable | Yes | Custom attributes: Cross Reference Part Number | 1998 1999 2000 2001 2002 2003 2004 |
| Custom attributes: Store Speciality | Suspension & Steering | Custom attributes: Position | for driver & passenger side, front suspension kit |
| Custom attributes: Finish | Coated | Custom attributes: spec | 4pcs Front Upper & Lower Ball Joints Kit For 98-04 Frontier 00-04 Xterra 2.4L |
| Product details: Universal part | No | ||
Product Description
Ball Joint Ball Joint Replacement Guideline: If there is a knocking or clunking noise in the area of the front axle when the car is traveling over road bumps, potholes or curbs, then there is usually a defect in a component of the wheel suspension The side of the front axle from which the (vibration) noise is emanating can already be determined during a test drive. The type of noise also already provides certain indications for maintenance regarding which components might be faulty 1.Raise the vehicle and remove the front wheels 2.To loosen the fastening screws and fixing nuts of the compression ball joint more easily, spray them with rust remover and allow to act for a few minutes 3.Loosen the fastening screws of the broken ball joint on the control arm and remove the nuts 4.Loosen and remove the fixing nut of the ball joint on the steering knuckle Tip:If the ball stud rotates, hold the ball stud in place with a hexagon socket 5.Remove the bad or worn ball joint from the control arm 6.Loosen the compression ball joint on the steering knuckle using a suitable special tool 7.Clean the cone connection Tip:For better sealing and durability of the ball joint sleeve, a little silicone grease can be applied to the contact surface 8.Insert new compression ball joint in the control arm and steering knuckle and tighten with new fixing nuts 9.Reinstall front wheels. Lower the vehicle and tighten the wheel studs to the tightening torque specified by the vehicle manufacturer 10.Measure the chassis and adjust it using the various holes on the compression ball joint if necessary 11.Finally, carry out a test drive Frequently Asked Questions (1).How will I know that I have to renew my ball joint parts? Or replace them? If your ball joint fails, you will listen to a strange sound while driving. And that sound may help you to realize that your ball joint has failed and you have to renew them (2).What happens if a ball joint breaks? When a ball joint breaks, you will hear a mysterious noise inside your car wheel Your car tire will wear-out since your alignment will be broken, and you will feel the car getting out of control If the ball joint breaks completely, it can be separated, and things can turn sour quickly. The wheel will stop being nice and can even steer you off the road. It can be serious Broken ball joints will seriously affect the steering and suspension. It can even result in your wheel falling off the car (3).Are worn ball joints dangerous? Yes, it can be quite dangerous. Because, a worn ball joint causes suspension damage, inspection failure, and breakage of related parts It might make your front suspension come apart while driving, so the wheels move in whatever direction inertia takes them. That can lead to a fatal accident (4).What happens if I don\'t replace ball joints? (5).Do I need to grease new ball joints? I would say it will be a wise decision if you grease your new ball joints. At least I will always grease a new 1 after the installation. Greasing a new ball joint will make it stronger and extend its lifetime because there is a minimal amount of grease inside. I suggest you do so after the first installation. Follow the instruction card